

Automating AWS S3 deployment using firefly

Overview
In this post, we delve into the exciting world of Firefly and how it can be utilised to create highly efficient and effective Terraform IaC code for deploying S3 buckets on AWS.
We recognise the importance of well-crafted information for your independent projects, and we are committed to providing you with the best resources available. We hope this blog post is informative and helpful, and we wish you continued success in your professional endeavours.
What is Firefly?
Firefly is a Cloud Asset Management solution that enables DevOps, SRE, and Cloud Platform teams to rediscover their entire cloud footprint, understand which parts of it are codified vs unmanaged, detect drifts to prevent service failures, classify assets using Policy-as-Code, and manage a single inventory of all their cloud resources across Multi-Cloud, and Kubernetes clusters.
For whom is this guide for?
This blog is intended for DevOps engineers, cloud engineers, and security engineers who are heavily involved in automation and looking for a way to automate and manage their infrastructure as code (IaC) tasks. It is also intended for anyone who is interested in learning more about Firefly and how it can be used to deploy S3 buckets and other cloud resources.
Prerequisites
Firefly account: A free account also works for this blog.
GitHub account: We are using our GitHub repo for this.
GitHub Actions: For the CI/CD pipeline, we are utilising GitHub Actions.
AWS Account: For this, you can use a free tier AWS account, which is sufficient for this particular tutorial.
AWS CLI: It is a unified tool to manage your AWS services.
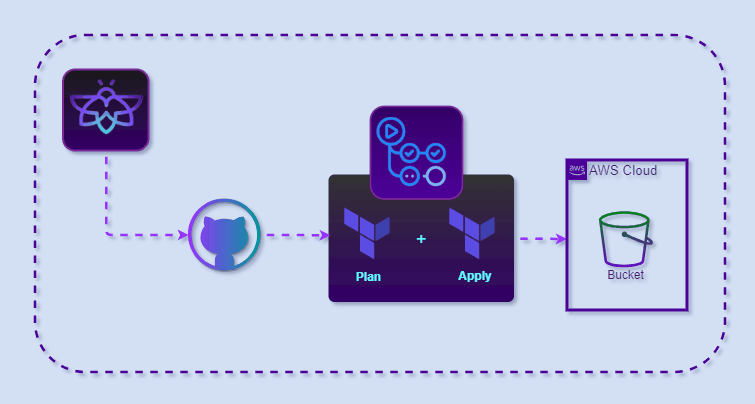
Workflow
Github repo creation
Pipeline setup
Secrets creations in the repo
Logged into Firefly
Explore Firefly dashboard
IaC (Terraform) code generation from Firefly modules
Push code from Firefly to GitHub via pull request.
PR review and merge in GitHub
Pipeline triggered
Check the GitHub workflow status
Go to S3 and check the S3 bucket created.
Let’s get our hands on the tutorial
To begin with this tutorial, you need a source code repo to keep your infra code. In this tutorial, we are using GitHub to store our infra code.
- Visit GitHub and log in with your credentials.

If you have an existing one you can use that or create one.
In this tutorial, we are creating a brand-new repository.
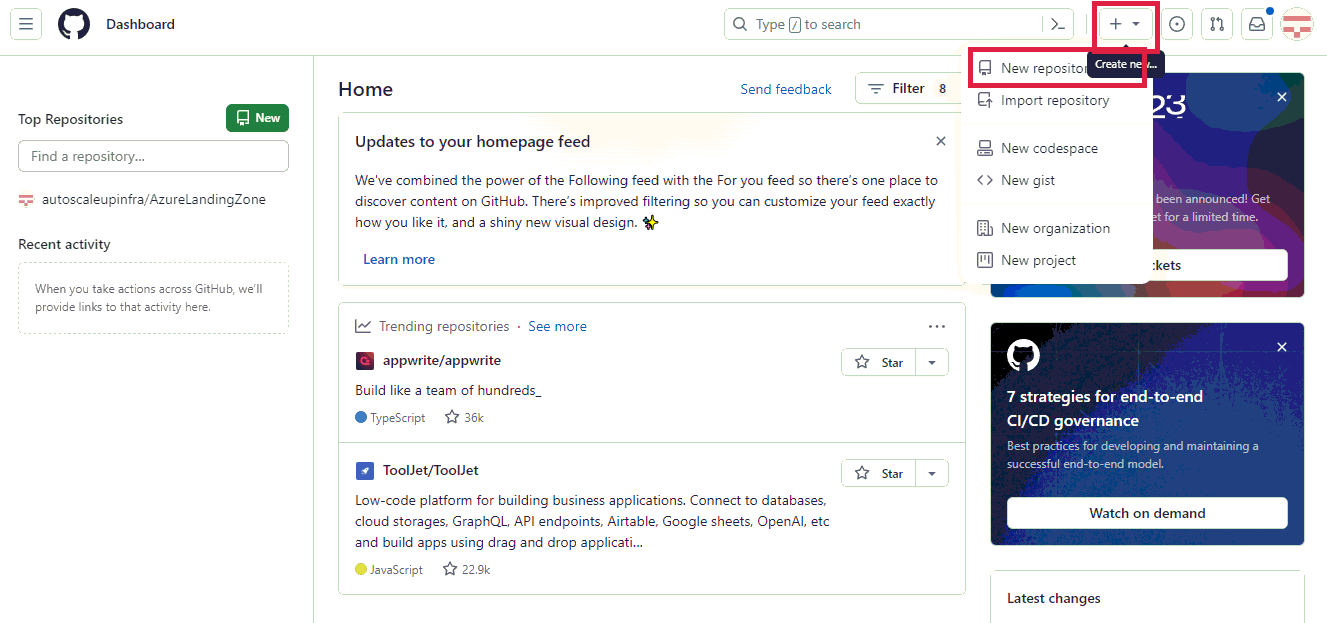
- Give an appropriate name of your infra and click on Create, it will create your repository.

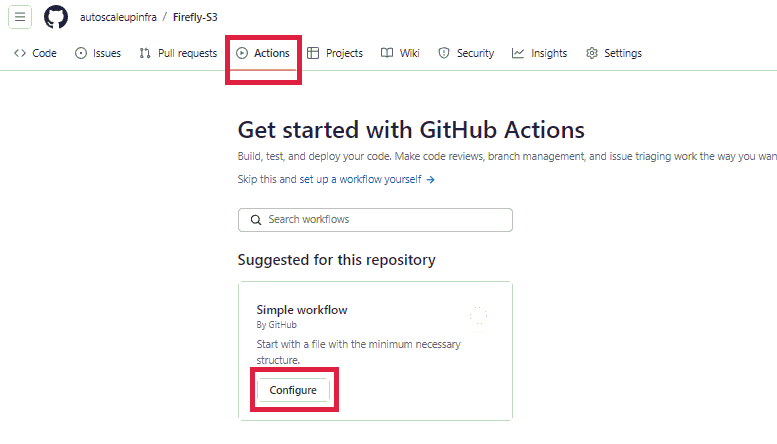
- Click on actions, then configure a simple workflow
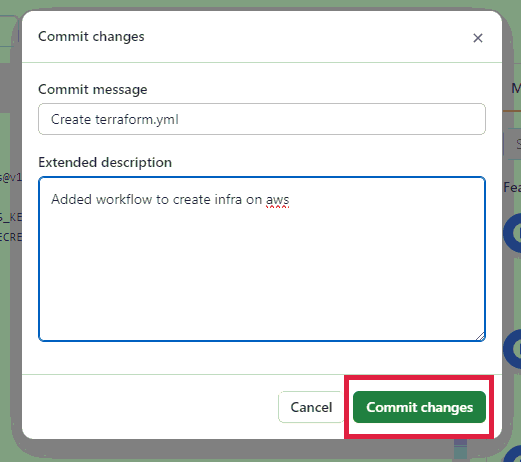
- Edit the filename as mentioned, replace the code from the code below, and click on commit changes.
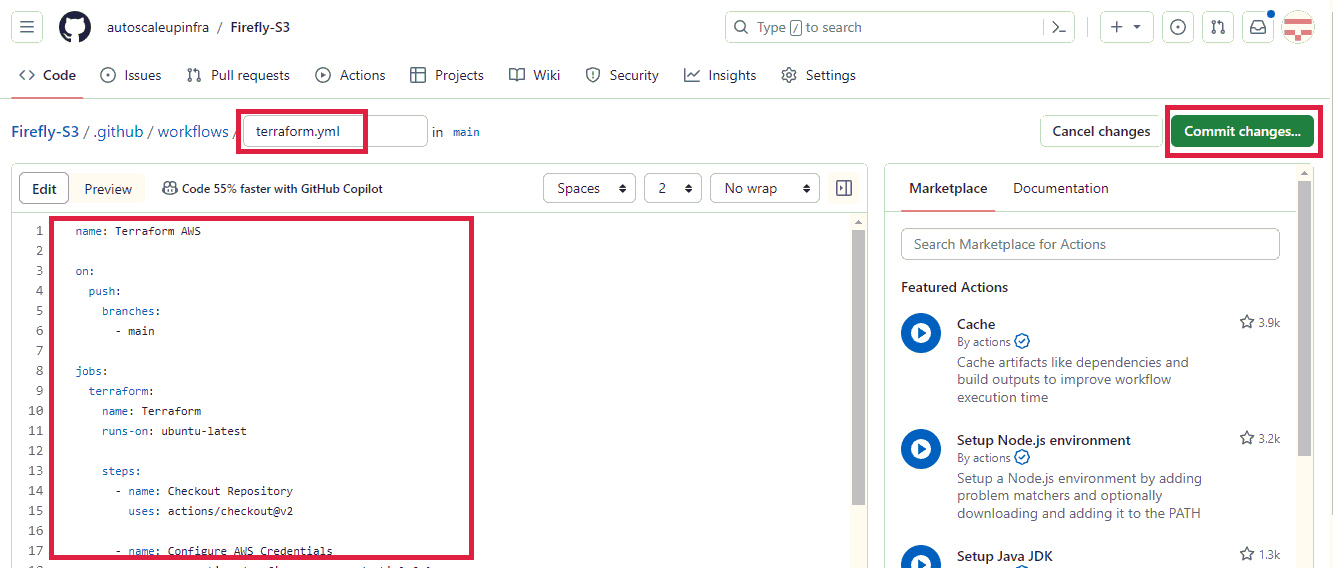
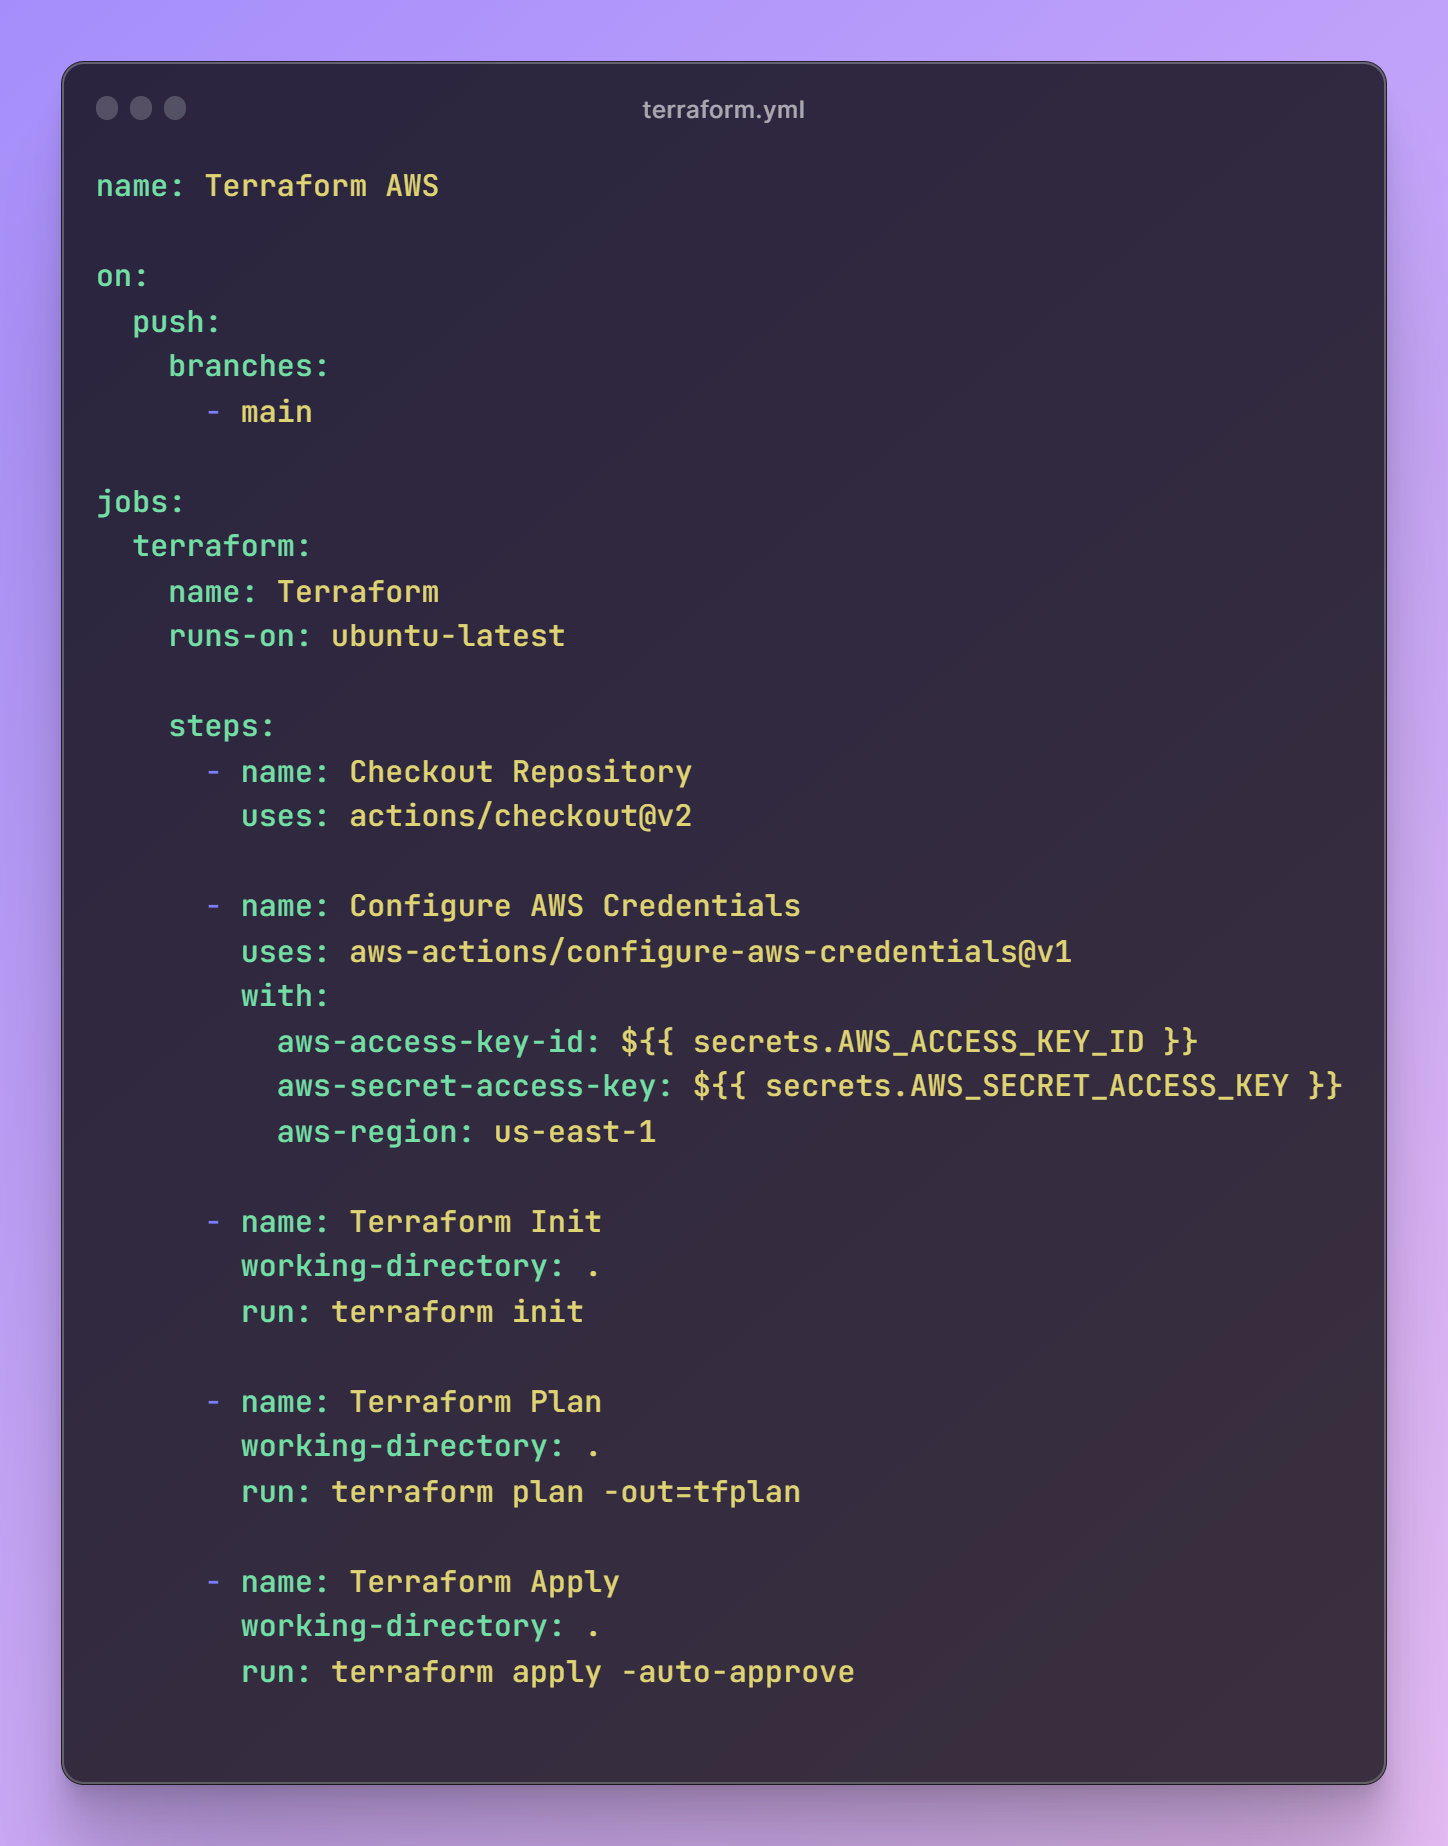
View pipeline code on GitHub
It's a YAML pipeline that will do the following tasks:
Check out the current repo.
Authenticate the AWS credentials.
Initialise it as a Terraform repository.
Then it will terraform plan command to show how many resources are going to be created
After the successful plan, the terraform apply command would run, which created the actual infra pushed from Firefly.
Click on commit changes and push the changes to the main branch.
Now, we have to store the AWS credentials to authenticate the workflow to create resources on the AWS cloud.
Don’t have credentials, click here.
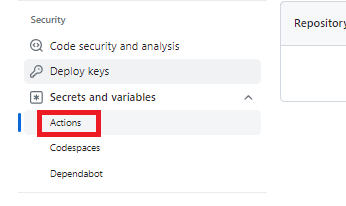
We require access_key and secret_key to authenticate workflow. These credentials need to be hidden, and we will store them as a secret for that click on the setting, then secret and variables.

- Click on Actions under Secrets and Variables.
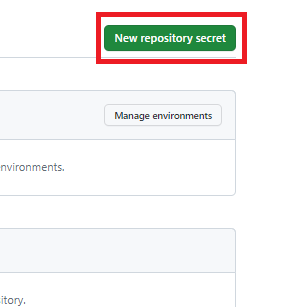
- Click on New Repository secret
- Write the same name as mentioned, replace <access_key_id> with your ACCESS_KEY_ID, and click Add secret.

- Add another repository secret with the name mentioned below, replace seceret_access_key with your <secret_access_key>, and click on Add secret.

- After saving secrets this is how it will look like.

Till this, we are done with the GitHub repository setup.
Now Firefly comes into the picture, and we will learn how to start with Firefly, wherein we will generate IaC code for various resources on different cloud providers and push that generated code into our git repositories via raising a pull request. For this tutorial, we will use Firefly to generate IaC code for S3 and make this code into our GitHub repository.

- Log in to your Firefly account using your email and password or you can continue with a Google, Github, or Microsoft account.

- After login, you will be redirected to the Firefly dashboard.
In this dashboard, you can see the IaC stack, IaC coverage, cloud providers, and How many of your resources are codified, Drifted, Ghost, Unmanaged, etc.
Codified: Codified assets are assets that exist both in an available IaC state file and in an integrated provider, with identical properties and values
Drifted: Drifted assets exist in an available IaC state file and an integrated provider, with differences in some properties and their values.
Ghost: Ghost assets are assets that exist in an available IaC state file but don’t exist in any integrated provider (e.g., an AWS account)
Unmanaged: Unmanaged assets are assets that exist in an integrated provider but not in an available IaC state file
In the mentioned dashboard we can see
1 AWS account
1 Terraform stack
0% drifted
4.48% codified
95.52% code unmanaged
These unmanaged resources can be managed through Firefly. For more info visit Firefly.

- Below is your Inventory where you can see all your Unmanaged and Managed resources. You can codify the Unmanaged assets via Firefly. It will generate the code for the resources.

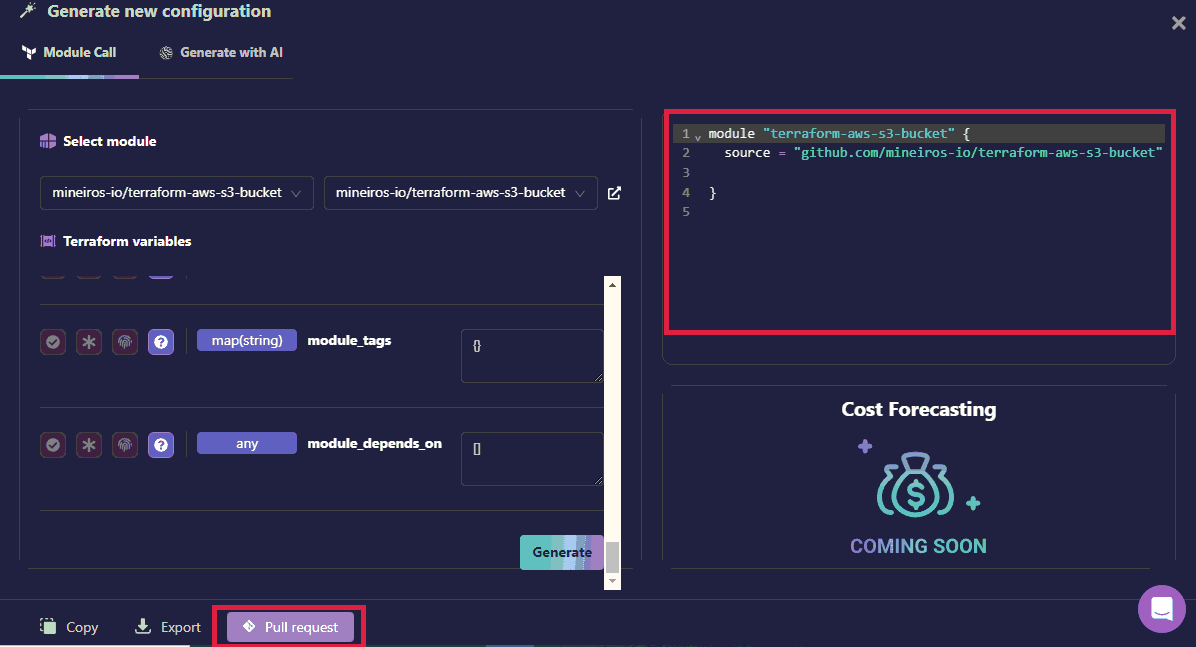
- Click on the Compose button,and it will redirect to another tab where we can generate IaC code via module or Generate with AI. This tutorial will use the module to generate the IaC code via Terraform for the S3 bucket.

Click on the module
The Module is a collection of standard configuration files in a dedicated directory.
Terraform modules encapsulate groups of resources dedicated to one task, reducing the amount of code you must develop for similar infrastructure components.
Firefly has maintained a top-listed infrastructure repository to generate IaC code for various resources so that you don’t have to write things from scratch. In this tutorial, we will demonstrate how to use Firefly to create S3 on AWS.

Here is the search bar. Y
ou can search any of the cloud resources. In this tutorial, we will proceed with S3. Search for S3 and choose any repository

- Here, you can see various parameters like variable type, variable names, and whether these fields are mandatory or optional, etc. You can make customisation as per your requirements like bucket_name, policy, etc.
If we keep these variables null, the Terraform will take the default values from the modules.
After selecting the repository, click on the icon below

- Click on the Generate button; It will generate tf code along with necessary files using its inbuilt powerful AI.

Now the pull request button is available,
Pull request is used to push our code to our GIT repository, and after reviewing the code, the repository owner merges the changes to save it in the repository.
Click on the pull request button to make a pull request
- Now select your Version Control System integration it could be GitHub, GitLab, or Bitbucket, but for this tutorial, we are working on GitHub and we have only one integration as of now, you may have many.

- After selecting integration, choose the repo where you want to make the pull request. Firefly fetches all the public and private repos from your version integration. Here, we have only two repos. You may have more.

- After selecting the repository, click on the create button it will raise a pull request to the GitHub repository.

- All done, we are ready to merge the request. Click on ‘Take a look at your pull request’ to see the pull request.

After that, you will be redirected to the GitHub page where you can merge this pull request to the main branch of the repository, and trigger the pipeline on merge to the main branch.

Click on the merge pull request it will make the changes in your main branch and merge the tf code into it.
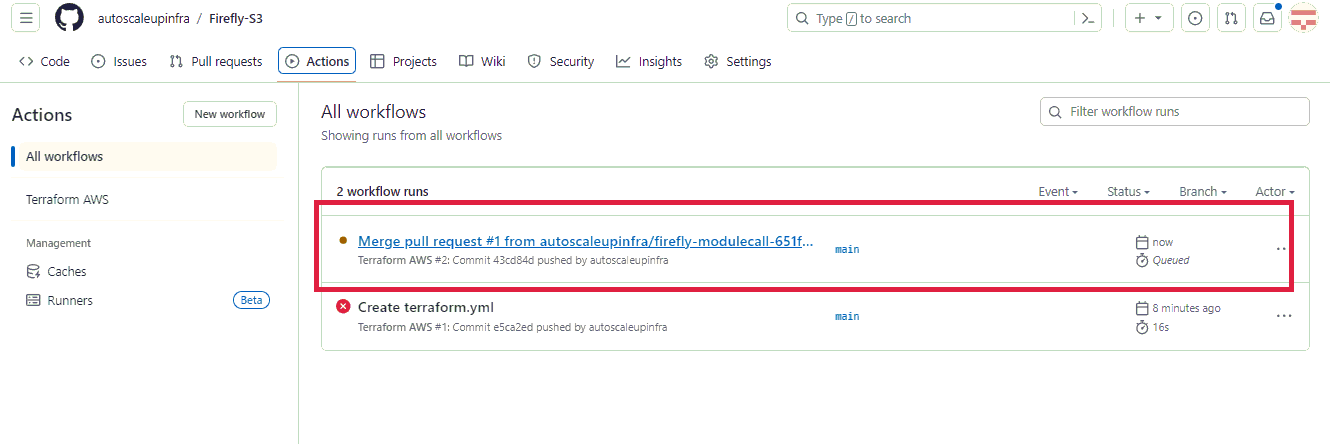
As soon as you merge the pull request, the infrastructure starts creating.

- After that, click on Confirm merge pull request to make the changes in the Github repo.

- Now click on the actions button, and you can see that the pipeline triggered automatically; Here infra creation is running.
- You can see the workflow of the pipeline first; it sets up the jobs, then checks the repository, configures AWS credentials, performs Terraform Init, Plan, Apply, runs post-configure AWS credentials, Post checkout repository, and finally completes the Job.
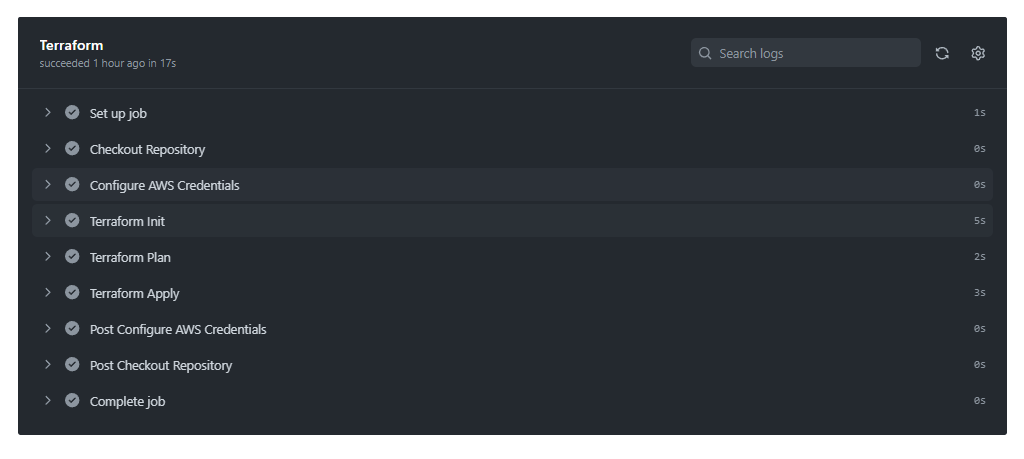
- We got a green check after running the pipeline successfully which means infra got created.

Here the resource gets created without a backend on S3. To create with the backend follow the steps below:
- Copy the repository URL from GitHub.
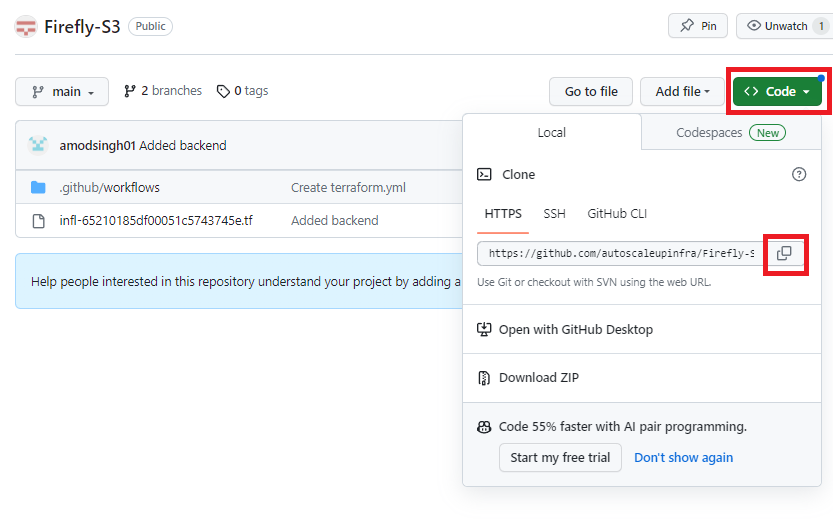
Clone the repository into your local system to make the changes in the terraform file.
Use the following commands as mentioned in the image below.
git clone <repository_url>.
cd <dir_name>
vi <file_name>
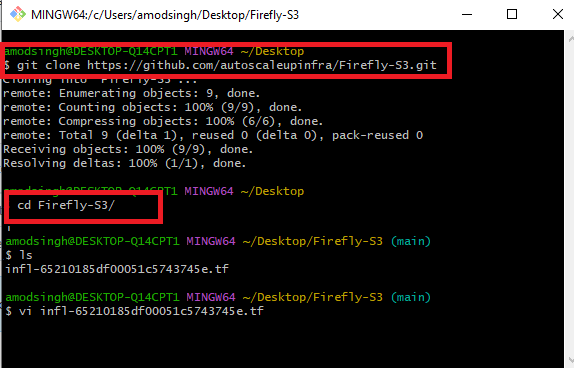
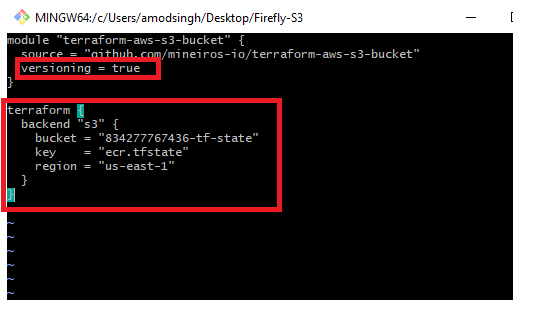
- When you hit the command “vi <file_name>” a text editor will open, type ‘i’ for insert mode, write the code below, and press ‘esc’ then ‘:wq’ to close the editor.

Click here to get the code.
Make sure you replace the bucket and region with your bucket name and region.
After saving the file write the following commands.
git add .-> (To add all files in the staging area)git commit -m “Added Backend”-> (To make commit with a message).git push origin main-> (To push all the changes to the main branch).

- When you hit
git push origin maina popup will appear as mentioned below. Enter the token and click on Sign in.

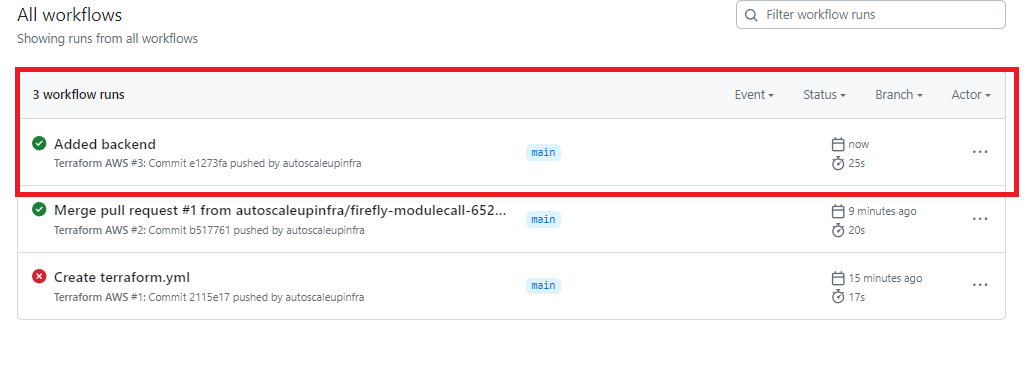
- As soon as you sign in, your changes are pushed to GitHub, and the workflow gets triggered and another bucket will get created in your AWS.
Let’s check our AWS console for the infrastructure:
- Login to your AWS account and search for the S3 resource.

- We can see the two buckets have been created in our AWS account.

We can also see the resource in the Firefly Inventory.
Both the buckets are displayed in the Inventory the one with backend and without backend.
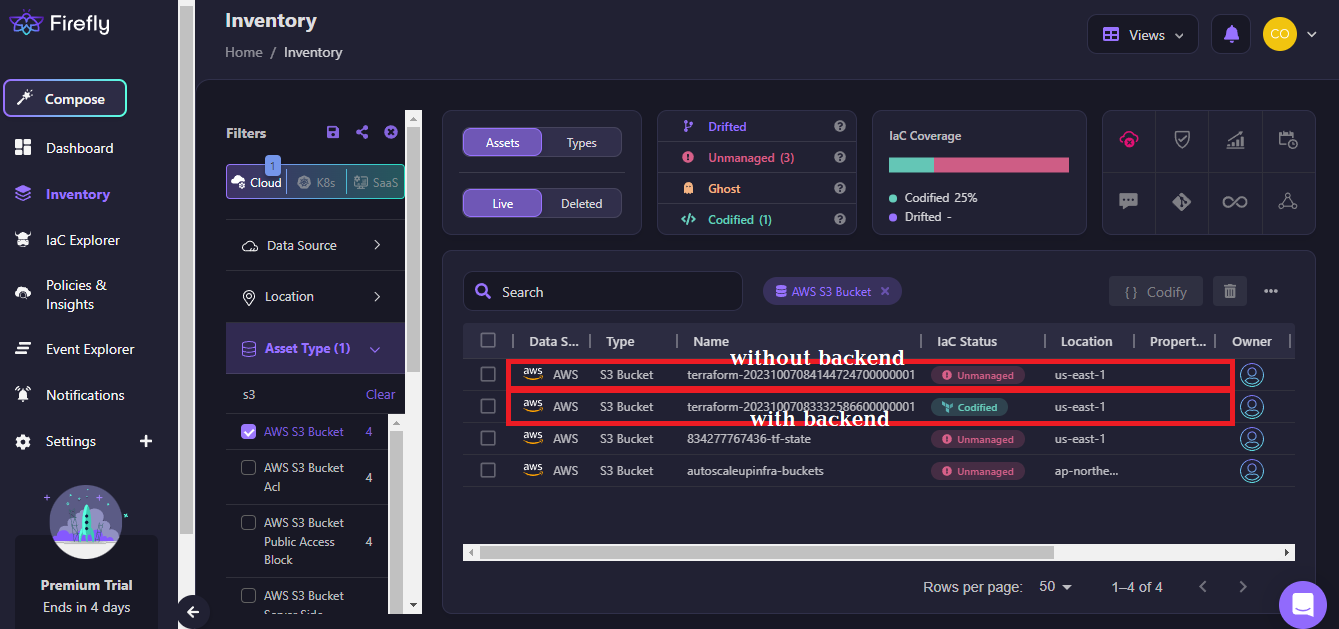
Note: It takes some time to reflect the changes in the Firefly inventory.
CONCLUSION
In this hands-on tutorial, we deployed an S3 bucket via Firefly. For that, we have done the following steps.
Created a brand new GitHub repository.
Configured the workflow in the GitHub repository
Added secrets in our GitHub repository.
Log in to Firefly.
Generated IaC code for S3 via Firefly module.
Made a pull request to our repository from Firefly.
Merged the pull request to the main branch.
The pipeline is triggered automatically.
S3 bucket was created on the AWS account.


