


Step-by-step guide

Overview
In this blog post, we're excited to introduce a remarkable capability of Terramate aimed at tackling the issue of code redundancy while adhering to the DRY (Don't Repeat Yourself) principle. Through this demonstration, we will illustrate how Terramate empowers us to construct Google Cloud Platform (GCP) infrastructure more efficiently and succinctly.
We'll shine a spotlight on one of Terramate's standout features - the ability to share data using globals. We'll explore the concept of globals and how they can be employed to streamline similar code segments across various contexts. These globals can also be conveniently placed in the terramate.tm.hcl file, which serves as the configuration file for non-git environments utilizing Terramate. During runtime, Terramate consolidates all .tm.hcl files into one, allowing you to place your globals within the stacks, keeping in mind the stack hierarchy. It's important to note that a stack can only access globals within itself and cannot function outside of its stack.
Our primary focus will be on deploying GCP infrastructure using Terramate in three essential real-world environments:
Development.
Staging.
Production.
Through a comparative analysis, we will showcase the efficiency of Terramate in configuring:
Virtual Machines
Google Container Registries
Storage Buckets
Why did we use Terramate?
Let’s take a scenario, of how we work. Earlier we manually created different environments/folders manually and put our all configuration codes which were the same for each environment into it. This was a little time-consuming process for us as a developer who wants to spend more time on development not on simple copy-pasting and this process also includes human error possibility, which we want to avoid.
Later we came across Terramate that can solve this problem for us by maintaining uniformity in all configuration files in different directories/folders that were termed as stack in Terramate documentation.
In this blog, we will look for a small example of how to use Terramate for different environments on GCP.
A step-by-step guide to spin up infrastructure using Terramate and Terraform
Who are the targeted audience of this blog?
- Developers have the opportunity to acquire the skill of creating efficient code by adhering to the DRY principle, which stands for "Don't Repeat Yourself." in this case we write terraform code once in globals and use it throughout the codebase to maintain uniformity and DRY(Don’t Repeat Yourself) principle.
Pre-requisites
GCP account: You can use your existing GCP account or make a new one for the tutorial.
Terramate Installed: Terramate must be installed in your system to fully utilize its DRY principle.
IDE: You can use any of your favorite IDE for this tutorial, here are some IDE download links in case you don’t have any VS Code or IntelliJ Idea.
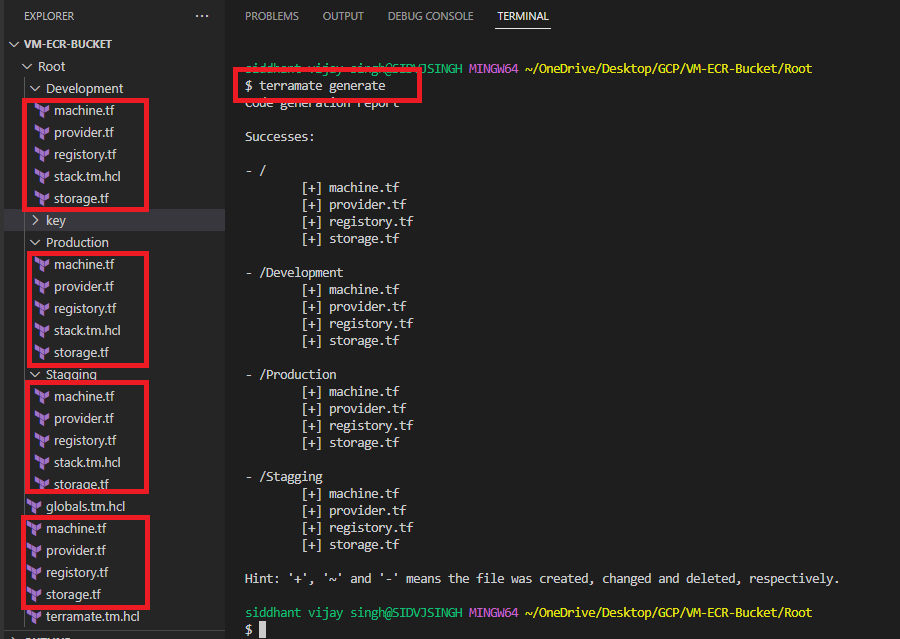
Structure of the project code
We are using three environments/stacks in this scenario:
The root stack contains all three environments/stacks.
Let’s understand what the global.tm.hcl file is doing.
Globals are defined that can be used throughout anywhere in the stack, it’s just like a constant variable.
provider.tf file is generated with GCP configurations,
Credentials: access key for GCP account.
Project: project name.
Region: the region in which you want your infrastructure.
Zone: the zone of that region in which the infrastructure will be.
storage.tf file is generated for the GCP bucket for storage.
registry.tf file is generated for the GCR(Google Container Registry).
machine.tf file is generated for the VM(Virtual Machine).
A special mention to a function that we used from Terramate for naming convention “terramate.stack.name”.
Since we are making the same infrastructure for each environment, we need to name them differently to identify each of them.
So there are two ways to do so:
First will use another global definition “env” and go into each stack's “stack.tm.hcl” file and define their “env” name there. By doing this, whenever we run “terramate generate” command, the inner env name will overwrite env name. But this is a little confusing and manual work is needed in this approach.
Since we are a developer we are a little lazy in doing manual work
Second, use the “terramate.stack.name” function whenever you need to define a name, this will automatically use the stack name at the place you write this. For example, we have given our bucket name as "infrasity-${terramate.stack.name}" the stack name will append at the end of this name.
To learn more about terramate.stack.name visit here.
# File name globals.tm.hcl

stack {
name        = "root"
description = "root"
id          = "2301fcb9-228d-48b2-ac3a-5dded4b35f79"
}

globals {
gcp_region           = "us-central1"
gcp_project          = "<your_project_name>"
gcp_zone             = "us-central1-a"
gcp_provider_version = "4.51.0"
}

generate_hcl "provider.tf" {
content {
terraform {
required_providers {
google = {
source  = "hashicorp/google"
version = global.gcp_provider_version
}
}
}

provider "google" {
credentials = "<your_key>"
project = global.gcp_project
region  = global.gcp_region
zone    = global.gcp_zone
}
}
}
generate_hcl "storage.tf" {
content {
resource "google_storage_bucket" "storage" {
name                        = lower("skilled-cargo-125849-${terramate.stack.name}")
location                    = "US"
public_access_prevention    = "enforced"
uniform_bucket_level_access = true
force_destroy               = true
}
}
}

generate_hcl "registory.tf" {
content {
resource "google_container_registry" "registry" {
project  = "<your_project_name>"
location = "US"
count    = 1
}
}
}

generate_hcl "machine.tf" {
content {
resource "google_compute_instance" "vm" {
name         = lower("vm-instance-${terramate.stack.name}")
machine_type = "f1-micro"
zone         = global.gcp_zone
boot_disk {
initialize_params {
image = "debian-cloud/debian-11"
}
}
network_interface {
network = "default"
}
}
}
}
Deploying Stacks
Generate configuration files(terraform files) from globals in each environment:
- Run “terramate generate” command to generate the files
Now we can run all the configuration files using following commands:
If you want to run the same Terraform command for each stack not one-by-one but all at once, you can use “terramate run” as prefix and add any Terraform command with it as a postfix, it will run for each stack at once.
- “terramate run terraform init” to initialize terraform in each stack

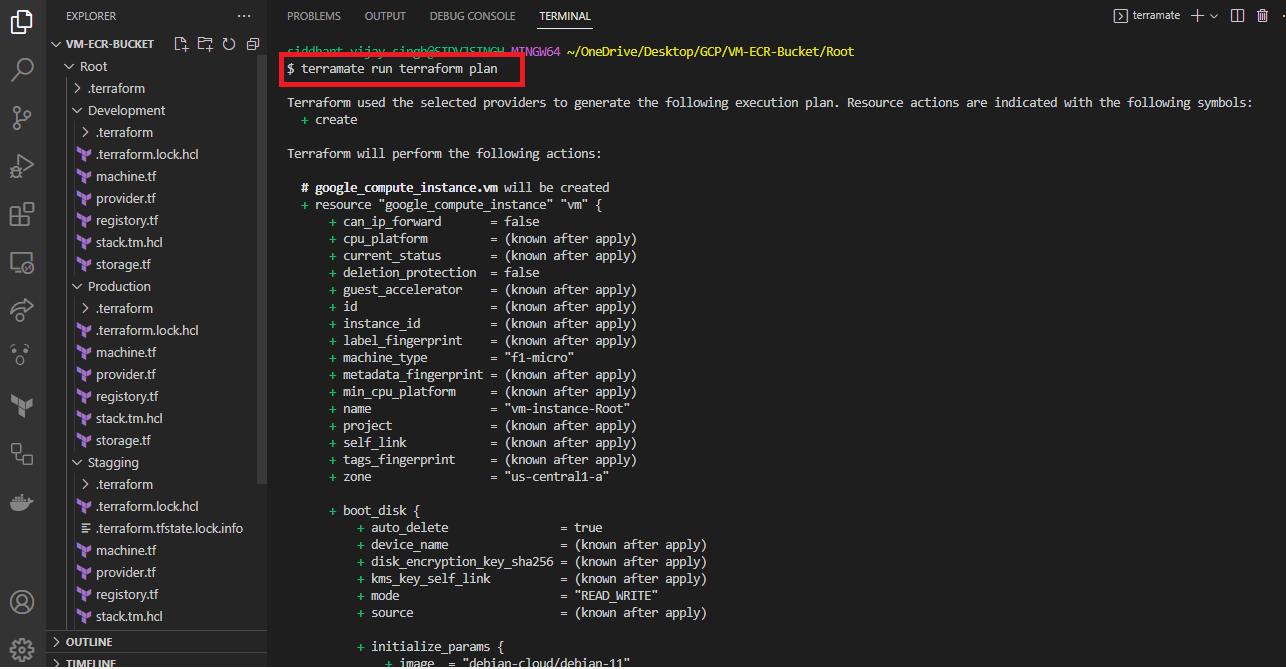
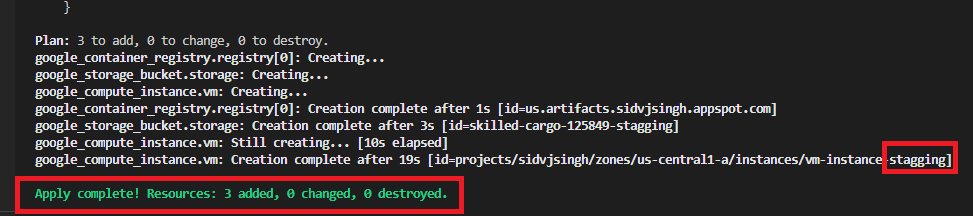
- Next is to plan the changes : “terramate run terraform plan”
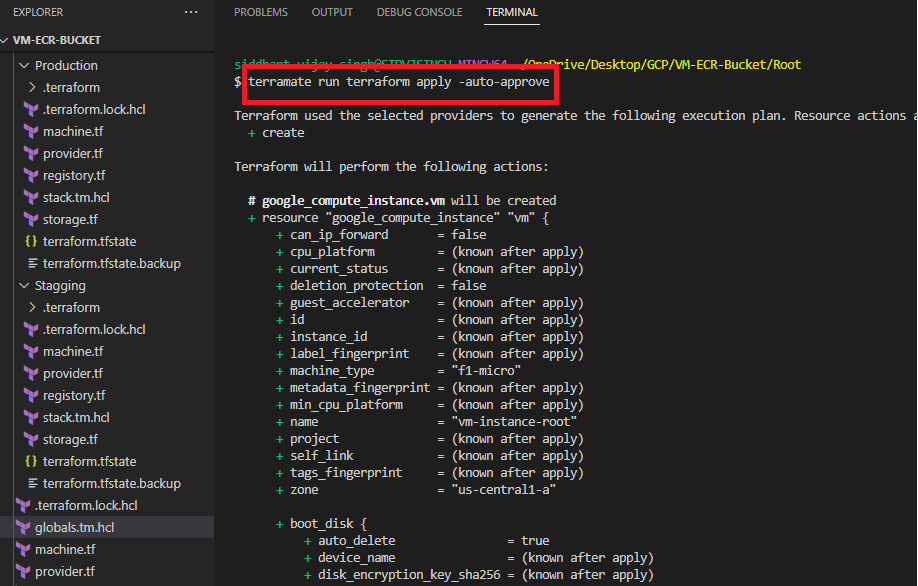
- Next is to apply all the infrastructure: “terramate run terraform apply”
For each environment, we have made all three resources
- Development

- Staging
- Production

Now let’s go into our GCP account to check if everything is configured
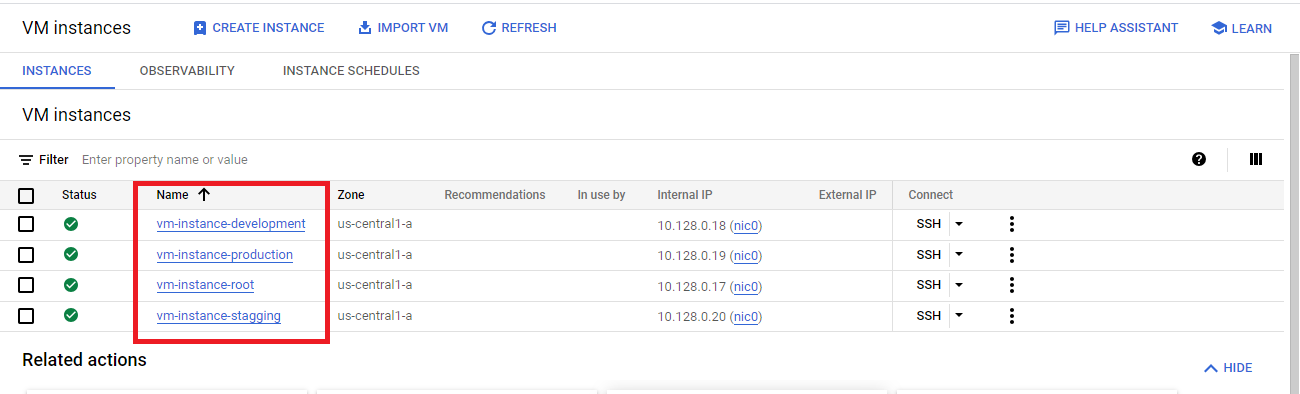
Virtual Machine
- Write in the search bar for “VM” and click on “VM Instances”

- There you will see all of your Virtual Machines
Buckets
- For Buckets search for “buckets” and click on “Buckets”

- Here you will see all your buckets

- In case of Google Container Registry: You need to push some docker image to see it using your console.
Key Points
In this blog, we have learned how to use Terramate for GCP and built Virtual Machine, Google Storage, and Google Container Registry.
We have seen relevant code for all the configurations written in the “globals.tm.hcl” file.
Generated all the configurations in each environment using the “terramate generate” command.
Later we run all the configuration at once using “terramate run terraform init” command to initialize and install all the terraform files in each environment.
Then “terramate run terraform plan” command is to plan the infrastructure.
Then “terramate run terraform apply” command to apply the configuration.
We understand that managing complex infrastructure can be tough, and making small changes without a lengthy process is important. That's why we recommend checking out Terramate and its examples.
Terramate has simplified our Terraform experience, and we believe it can do the same for you. So why wait? Give Terramate a try and improve your Terraform experience today!
Also, join their Discord channel for all future Updates about Terramate.